How to Create and Manage Classes in Woven
A step-by-step guide to creating classes, editing details, managing attendees, and cancelling sessions.
Classes in Woven are individual sessions — a specific class at a specific time. This article covers how to create them, what you can edit, and how to manage them once they’re live.
Creating a Class
From your admin dashboard, tap the + button to open the new class form. You’ll need to fill in:
- Class name — what clients will see on your public page (e.g. “Vinyasa Flow”, “Beginners Yoga”)
- Date and time — when the class starts
- Capacity — the maximum number of bookings you’ll accept
- Price — in pounds. Set to £0.00 for free sessions
- Location — select from your saved locations, choose 💻 Virtual (then enter a meeting URL), or leave unassigned
- Visibility — Public (on your marketplace page) or Private (direct link only). Defaults to Public
- Duration — optional, shown on class cards
- Description — optional, shown on the class detail page
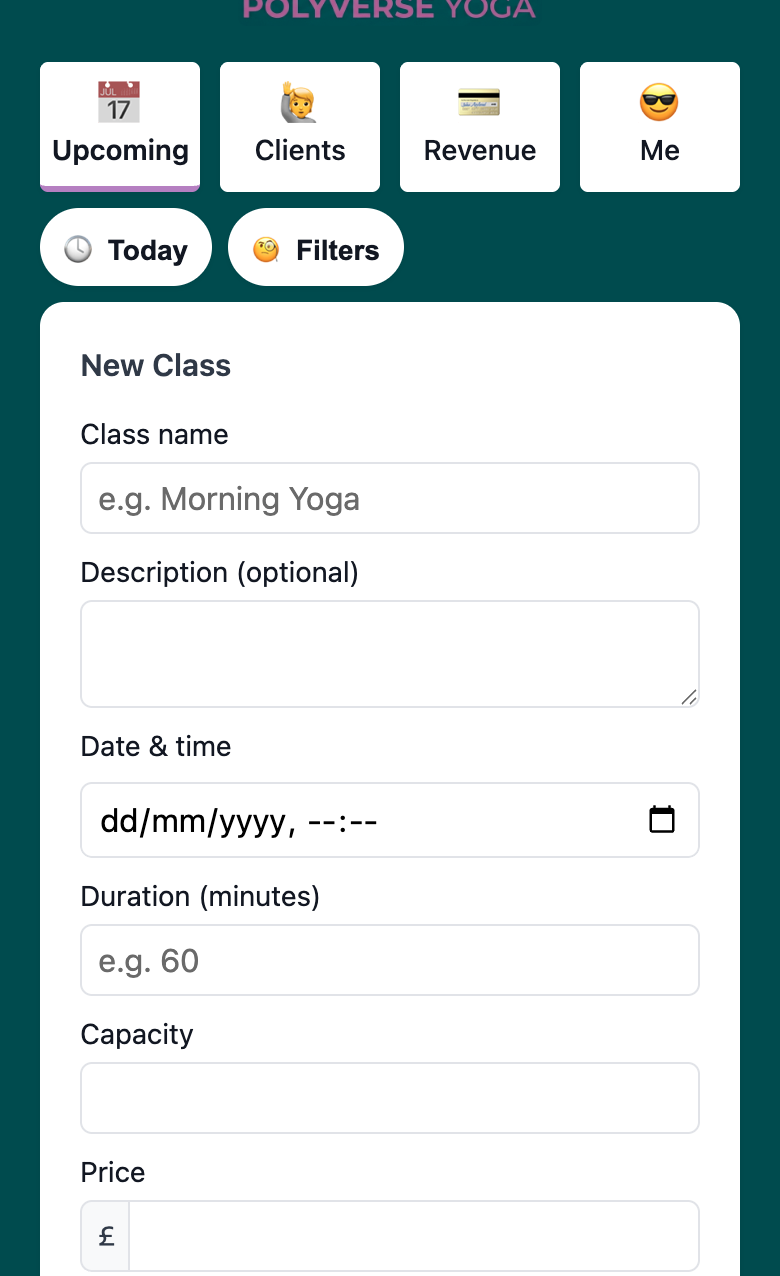
When you save, the class is created as a draft and won’t appear on your public page yet.
Publishing a Class
Draft classes are only visible to you — clients can’t book them until they’re published. To publish a class, open it in your admin and approve it for publication. Once live, it appears on your public page and clients can book immediately.
You can preview how a class will look before publishing using the preview link in the admin.
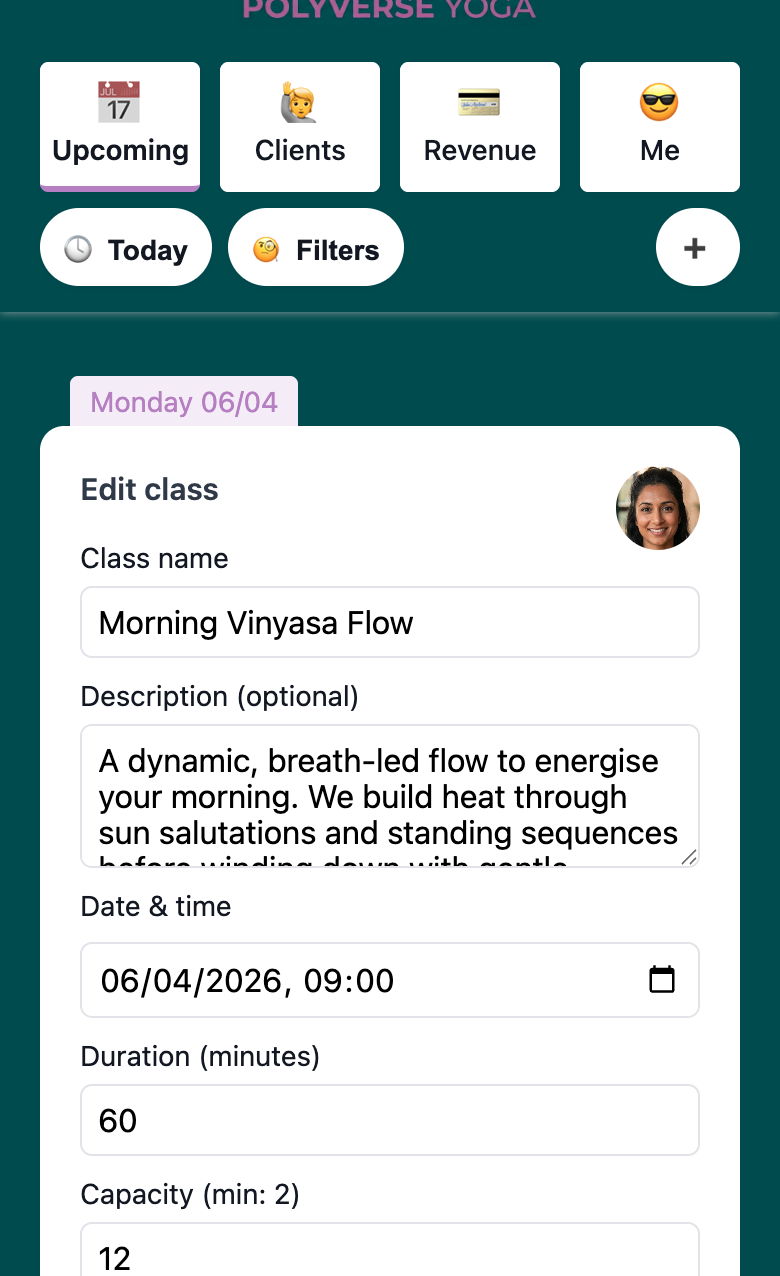
Editing a Class
You can edit a class’s name, time, capacity, price, description, duration, and location from the class detail view. Changes take effect immediately — if a class is live and clients have already booked, they’ll be on the updated session.
Tap the ✏️ pencil icon on any class card in your Upcoming list to open the edit form with the current details pre-filled.
If you’re changing something significant — like the time or location — it’s good practice to notify your booked clients directly via WhatsApp.
Setting Class Visibility
By default, every class you publish is Public — it appears on your marketplace page and anyone who visits your page can see and book it.
If you want to run a session for specific clients only, set the class to Private. Private classes are hidden from your public marketplace page but remain fully bookable via their direct link.
To change visibility, tap the ✏️ pencil icon on any class card to open the edit form. The Visibility field is a toggle — switch between Public and Private. Save the form for the change to take effect.
A few things worth knowing:
- Changes take effect immediately. Switching to Private removes the class from your marketplace page at once; switching back to Public adds it again
- Existing bookings are unaffected — changing visibility only controls discovery, not access
- Your admin dashboard shows a 👁️ Public or 🔐 Private badge on each class card (next to the attendance count) so the state is always visible at a glance
Use case: you want to fill a session from your WhatsApp group before opening it publicly — create it as Private, share the direct link, then flip it to Public once your regulars have had first pick.
Adding a Virtual Class
If you’re running a session online, select 💻 Virtual from the location dropdown when creating or editing a class. A Meeting URL field appears — paste the link to your Zoom, Google Meet, Teams, or other video call.
How the meeting link is shown depends on where in the booking journey a client is:
- On your public page (before booking): Clients see ”💻 Virtual” as a plain text label. The link is not visible or clickable — this protects it behind the paywall
- After booking and payment (thank-you page): The meeting link becomes a clickable link. Clients who have completed their booking can access it immediately
- In your admin: The full URL is visible and clickable at all times, regardless of booking status
To switch a virtual class back to a physical location: edit the class, select a venue from the location dropdown. The meeting URL field will clear.
Managing Attendees
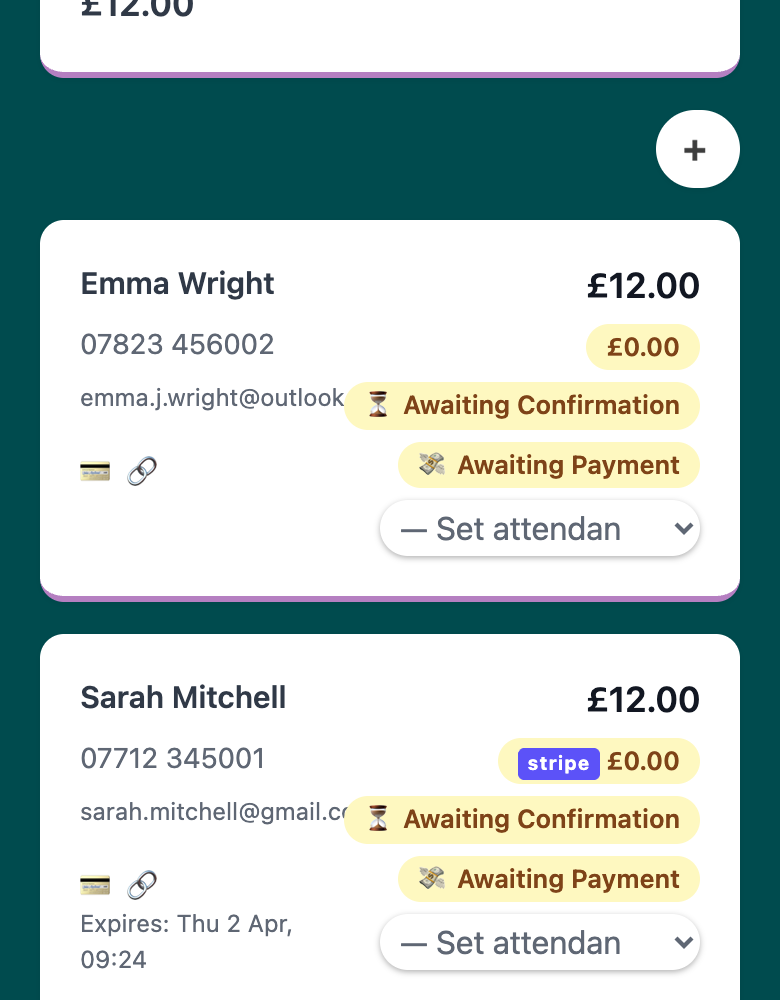
From the class detail view, you can see everyone who’s booked. For each booking you can:
- View the client’s name and phone number
- Check their booking and payment status
- Update payment status
- Record attendance after the class
- Generate and send a payment link
- Remove a booking
You can also add a client manually from the attendee view — useful if someone books outside Woven (e.g. in person or via WhatsApp) and you want to record it.
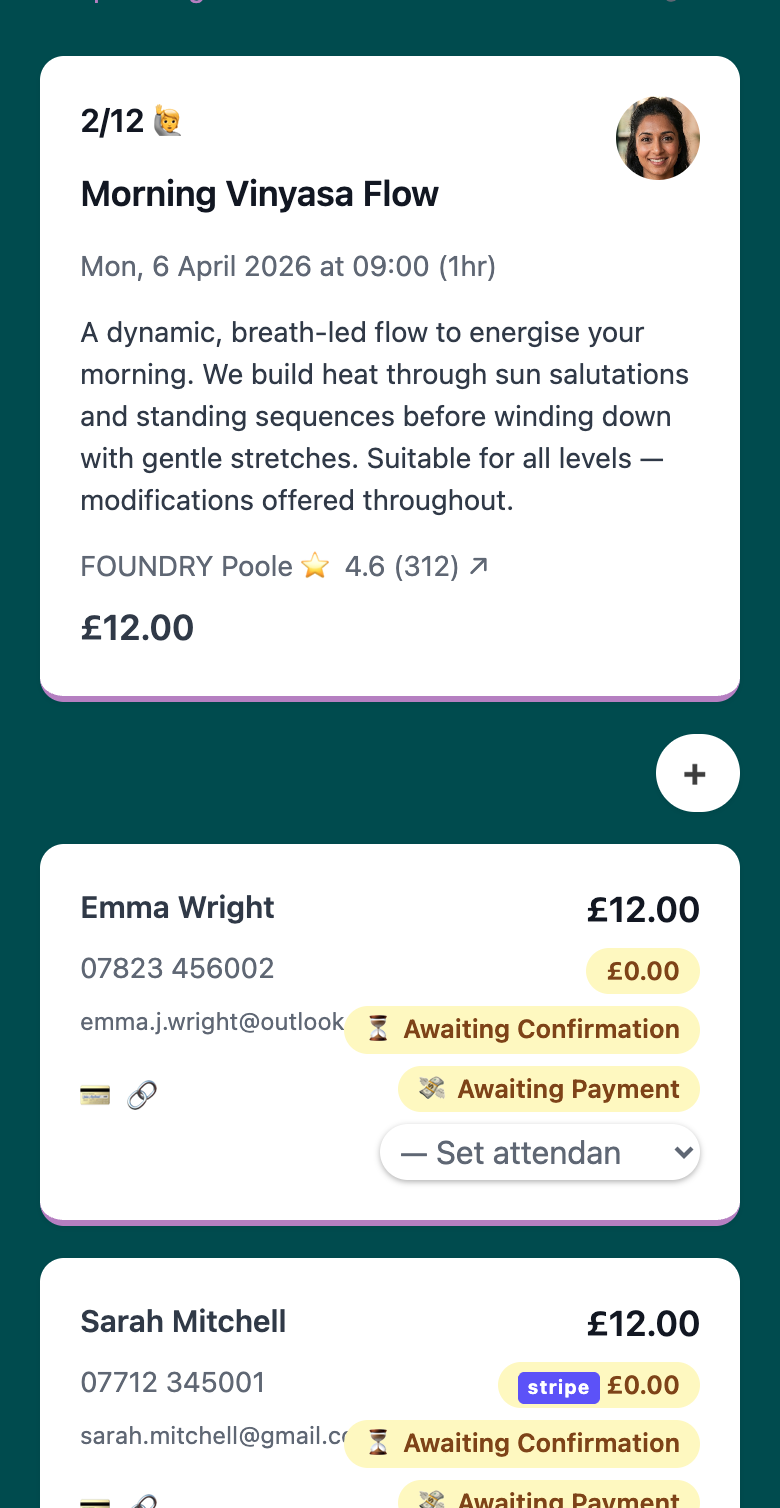
Payment Statuses
Each booking has a payment status that you can update from the attendee view:
- Awaiting Payment — payment expected but not yet received
- Paid — payment collected (via Stripe or marked manually)
- Awaiting Refund — payment received, refund in progress
- Refunded — refund issued
- Void — booking cancelled or invalidated; terminal state
You can update payment status manually when payment is collected outside Woven (cash, bank transfer). Stripe payments update status automatically.
Recording Attendance
After a class, record how each attendee showed up from their booking card. Attendance options are:
- Attended — showed up on time
- Attended (Late) — showed up after the class started
- No Show (Notified Me) — didn’t come, but let you know in advance
- No Show (Unwell) — didn’t come due to illness
- No Show (No Contact) — didn’t come, no message
Recording attendance accurately over time builds a picture of each client’s reliability and engagement. This data feeds into your client list — sortable by attendance rate — and helps you spot patterns before clients drop off entirely.
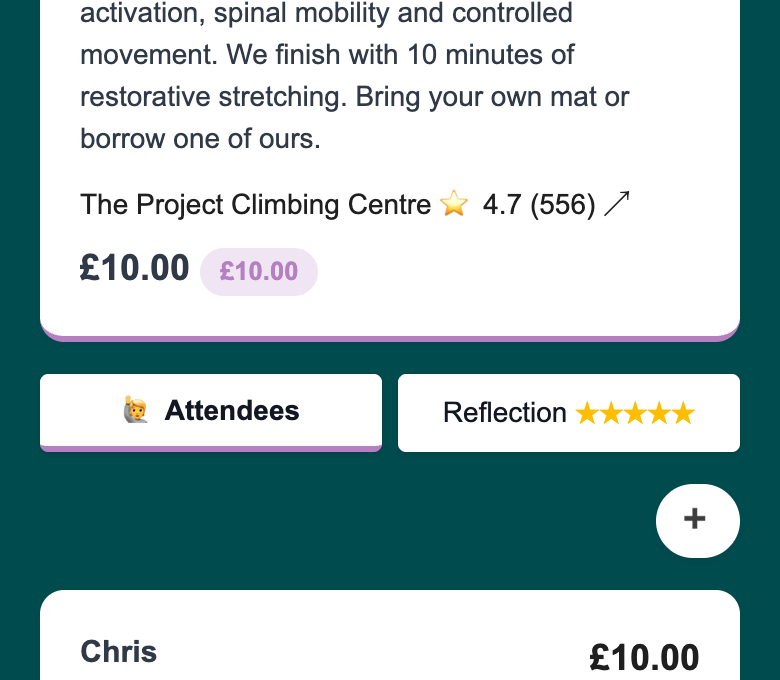
Post-Class Reflection
Every class has a 💭 Reflection tab on the class detail view, alongside the Attendees tab. This is a private journal for you — your clients never see it.
To add a reflection, tap the ✏️ pencil icon inside the Reflection tab. You’ll see:
- Star rating — rate the class from 1 to 5 stars
- What Went Well? — what worked; what to keep doing
- What Could Be Improved? — what to adjust next time
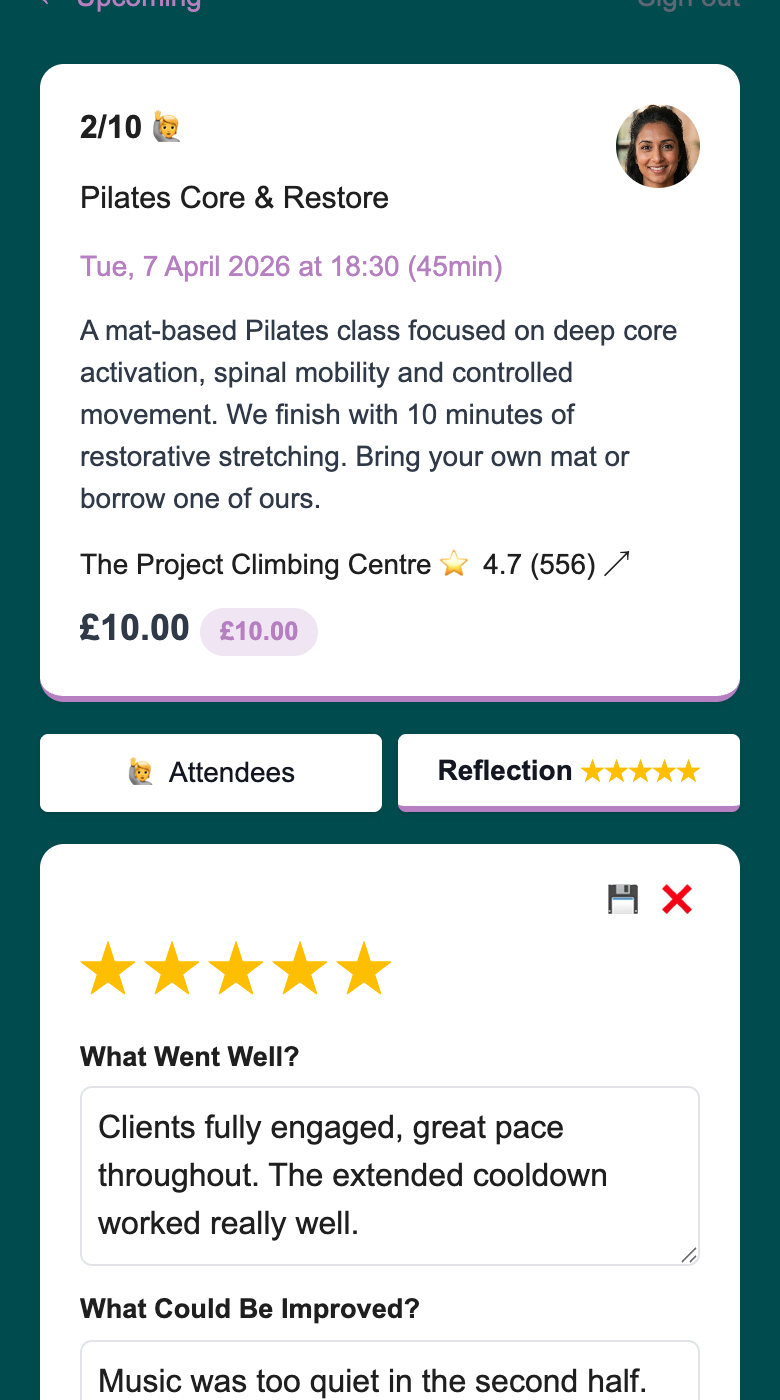
Tap 💾 to save. The reflection is stored against this class and you can update it any time using the pencil icon — the pattern is the same as editing your profile.
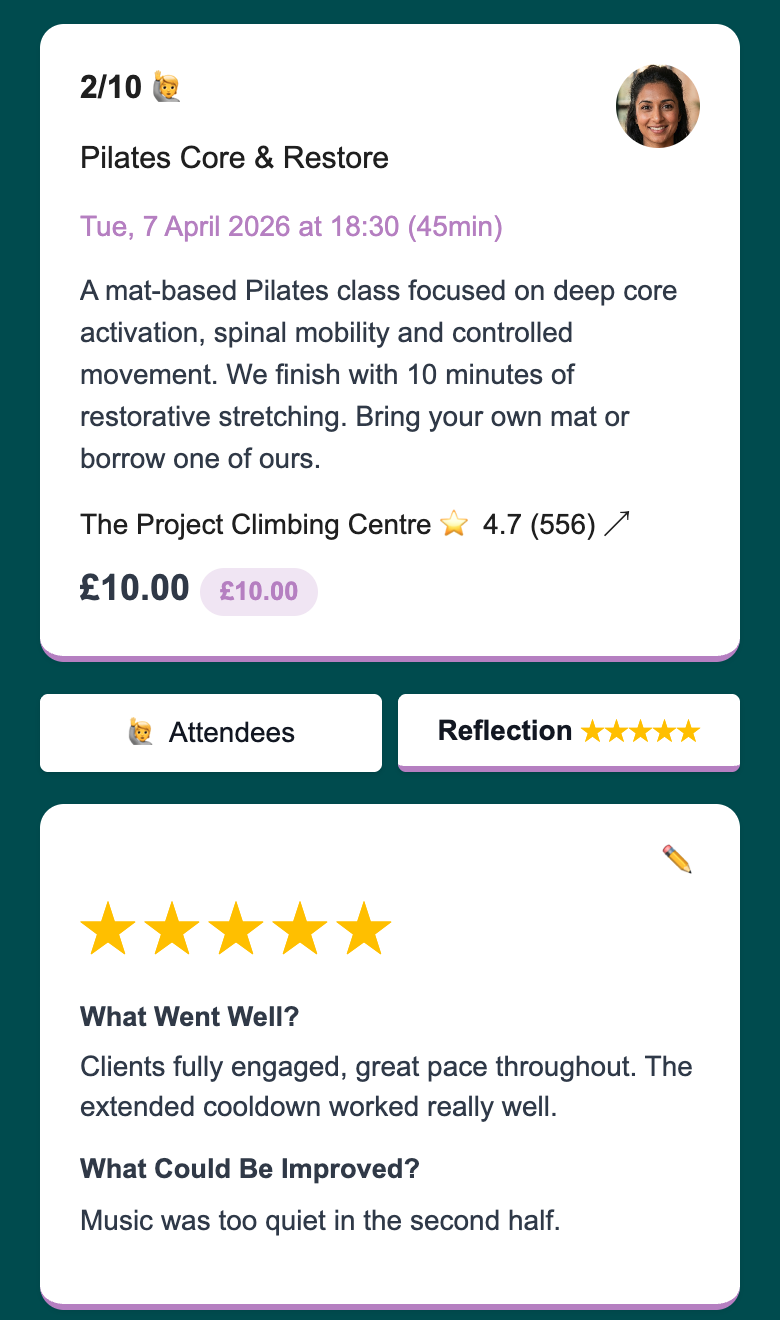
A few things worth knowing:
- Only you can see your reflections. They’re not visible to clients or on your public page.
- There’s no deadline. Add your reflection straight after class, or come back to it later.
- All three fields are optional. You can save a star rating alone, or leave the rating blank and just write notes.
Payment Links
When you add a client manually to a class, their place is reserved immediately — the booking is created as pending/unpaid and counts against class capacity. If you want to collect payment separately, you can generate a payment link from their booking card.
Custom pricing per attendee. Before generating the link, you can edit the price on that individual booking — useful for discounts, concessions, or one-off arrangements. The link will charge the client at that price instead of the default class price. The class price is unchanged for everyone else.
Payment links are valid for 24 hours. If the link expires before the client pays, you can generate a fresh one — the booking record stays on the class until you manually remove it. Once the client pays, their booking is automatically confirmed and marked as paid.
If you change a booking’s price while a link is active, the existing link is invalidated immediately (“Expired: Price Changed”) and you’ll need to generate a new one at the updated price.
Cancelling a Class
To cancel a live class, open it in your admin and use the cancel option. Cancelling removes the class from your public page. It does not automatically notify booked clients or issue refunds — you’ll need to do both of those separately via WhatsApp and Stripe.
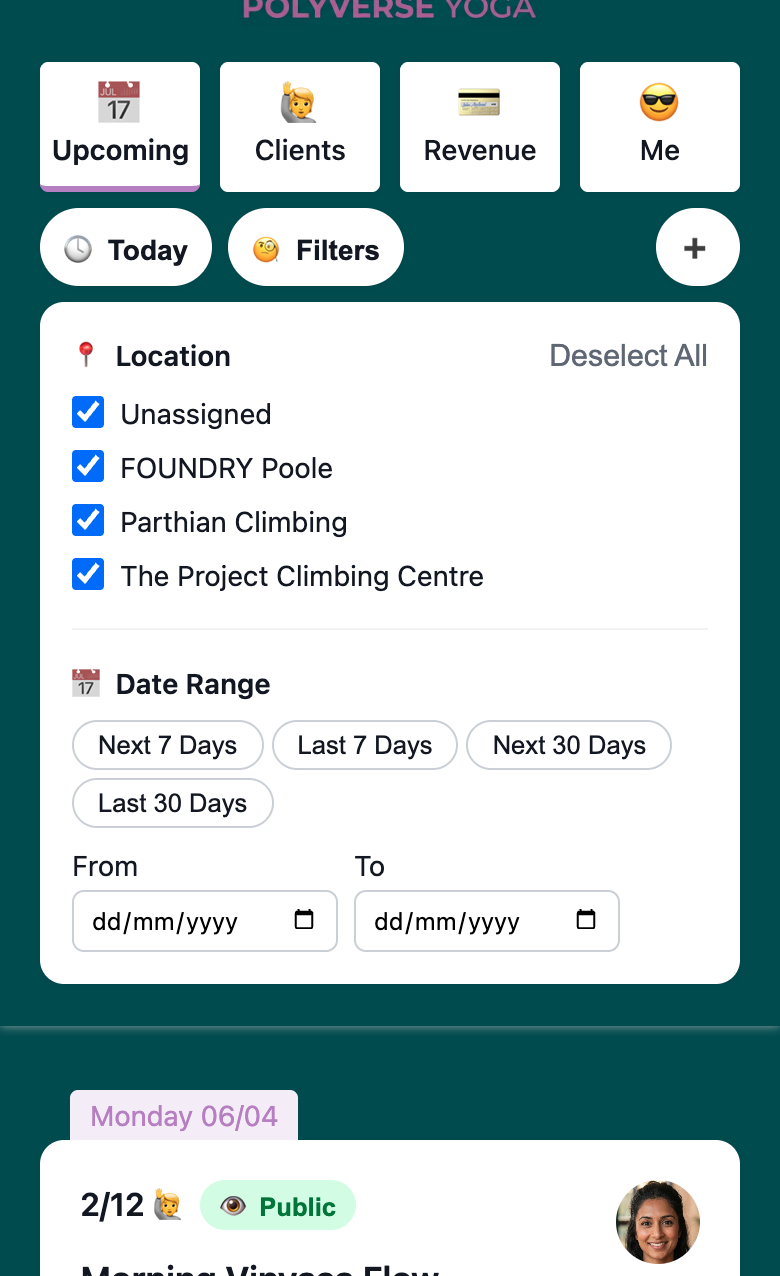
Class Filters
Your dashboard shows upcoming classes by default. You can filter by location and date range using the filter toolbar — useful if you run classes across multiple venues or want to look ahead at a specific period.
Related: